Hey everyone, it’s Jake here from the team that supplies radial drilling machines—you know, the ones that get the job done in metal fabrication shops, auto body garages, and even construction sites. I’ve been fielding so many questions lately from new shop owners and even some old heads who’ve been around the block but need a refresh: “How the hell do I adjust the drill head angle on this bad boy?” I get it. Radial drills aren’t like your portable cordless driver—this thing is big, heavy, and if you mess up the angle, you’re either gonna drill a wonky hole, strip a part, or worse, hurt yourself. Today, I’m breaking this down step by step like I’d show a new hire in my own warehouse—no fancy jargon, no overcomplicating it. Let’s dive in. Radial Drilling Machine
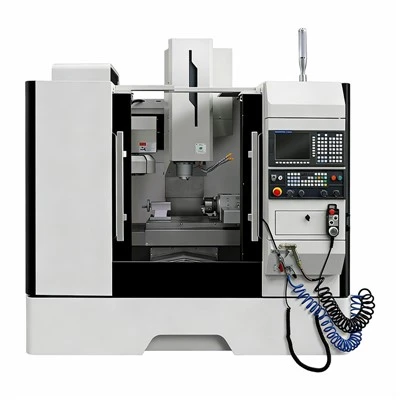
First off, let’s get one thing straight: the drill head on a radial drill isn’t just a random thing you twist. That head is mounted on the radial arm, which itself rotates around the main column. Adjusting the drill head angle means changing not just the head’s tilt, but sometimes the arm’s position too, depending on what you’re drilling. Most mid-range to heavy-duty radial drills (the kind we supply) have two main angle adjustments: the radial arm’s horizontal rotation, and the drill head’s own tilt on the arm. There’s also the knee and base, but we’re talking specifically about the drill head here, so let’s stick to that.
Before you even touch a lever or a knob, stop. Play by the safety rules, always. I’ve seen too many guys skip this part because they’re in a rush to get a job done. First, shut off the machine and unplug it—no exceptions. If it’s got a big hydraulic or electric brake, engage that too so nothing moves on its own. Wear safety glasses, obviously, and if you’re working on a big drill that’s heavy, maybe grab a buddy to help with the adjustments. The drill head can weigh 50 to 100 pounds, so you don’t want it slipping and cramping your fingers or worse. Also, check the workpiece. Make sure it’s clamped down tight to the drill table—if the part moves when you drill, the angle doesn’t matter anyway. And measure where you need that hole. If you’re drilling at a 45-degree angle to a metal plate, mark that angle with a protractor first—don’t guess. I’ve seen so many mistakes from “close enough” angles that cost shops a whole batch of parts.
Okay, safety done, let’s get to the actual adjustment. Let’s split this into two scenarios: adjusting the drill head angle relative to the radial arm, and adjusting the whole arm’s rotation to move the head to a different position. They’re linked, so it’s important to tell them apart.
First, adjusting the drill head’s tilt angle (that’s when you need a hole at an angle, not perpendicular to the table). On our radial drills, the drill head is secured to the radial arm by two big clamp bolts—usually on the sides of the head, or under the arm itself, depending on the model. Some have a handwheel to loosen them, others need a wrench or a hex key. Don’t loosen them all the way—just enough so the head can move freely. If you loosen them too much, the whole head might swing unexpectedly. Next, there’s a locking pin or a angle scale on the arm or the head itself. That scale is your best friend—it has markings from 0 to 90 degrees, usually with increments of 5 or 1 degree if it’s a precision model. Line up the pointer on the head with the angle you need. For example, if you need a 30-degree angle, align that mark. Double-check it with a combination square or a digital protractor—don’t just trust the scale, especially if the machine’s been used a lot and the scale’s worn a bit. Once it’s lined up, tighten those clamp bolts back down. Tighten them evenly, not just one side—if you tighten one too much, the head will tilt to the side, and you’ll have a wonky hole.
Now, if you need to move the drill head horizontally to a different spot (like if you’re drilling a hole on a long workpiece and need the arm to reach), that’s the radial arm rotation. The big ring at the base of the column lets the arm spin 360 degrees, right? Loosen the main arm clamp (that’s the big lever usually at the base of the column or on the side of the arm) and then you can swing the arm around. Again, there’s a scale here too, or you can use a tape measure to line up the distance from the column to the workpiece. Once it’s in position, tighten the main arm clamp—make sure it’s secure, because if that arm slips when you’re drilling, you’ll snap the drill bit and ruin the part.
Wait, what if you need an angle that’s not between the scale marks? Like 22 degrees? Most good radial drills (the ones we supply) will have a fine adjustment feature—usually a small screw or a handwheel on the side of the drill head that lets you tweak the tilt a tiny bit after you set the main angle. That’s for precision jobs, like drilling holes for bolts that need to line up exactly. Don’t skip that fine adjustment if you’re doing work that matters; it’ll save you so much headache later.
Also, a common mistake I see all the time: forgetting to re-tighten everything after you make an adjustment. A customer called me last month saying their drill head was slipping mid-drill, and when we went out to check, he’d loosened the clamps to adjust the angle but never tightened them back. That’s a huge safety hazard, and it’s why so many guys break drill bits. So after every adjustment, double-check every clamp: the side bolts on the drill head, the main arm clamp, even the knee clamp if you moved the whole arm up or down. Tight them until they’re snug, but don’t use a pipe wrench to crank them—you’ll strip the bolts or warp the arm, which will throw your angle off even more.
Another thing: if your machine has a hydraulic system, like some of our larger models, the adjustment is a little different. You loosen the hydraulic lock for the head and arm, adjust to the angle you need, then engage the hydraulic lock. Hydraulic drills make adjustments way easier because the head glides instead of being heavy, but you still have to double-check the angle. I always tell new customers to do a test drill on a scrap piece of the same material as their workpiece before drilling the real part. Just a small pilot hole, then measure the angle with a protractor to make sure it’s right. It takes 2 minutes, and it saves you from ruining expensive parts.
Wait, let’s talk about maintaining the angle settings too. Over time, the clamps and the scale can get worn, especially if you’re using your drill every day. Every few months, give the arm and head a quick clean—wipe off metal shavings, grease, and dirt, because that stuff can make the clamps slip or the scale hard to read. If you notice the angle is off even after you set it correctly, it might be time to calibrate the machine. Most radial drill manuals have a calibration step, but if you’re not comfortable doing it, our team is always here to help—we supply parts and service too, not just the machines.
I get it, adjusting the drill head angle seems intimidating if you’ve never done it before. But once you do it a few times, it’s second nature. The key is taking your time, following safety steps, double-checking every setting, and testing with scrap material. At the end of the day, a radial drill is one of the most versatile machines in a metal shop, but only if you know how to work it right.

If you’re in the market for a new radial drilling machine, or if you have questions about adjusting settings, maintaining your current machine, or even upgrading your shop’s equipment, feel free to reach out to our team. We’ve been working with fabricators and repair shops for years, so we know exactly what you need to get the job done efficiently and safely. Don’t hesitate to connect and chat—we’re here to help you make your workshop run smoother.
Horizontal Milling Machine References:
- Modern Metalworking: Machine Tools and Operations, Industrial Press Inc., 2021
- Operator’s Manual: Radial Drilling Machine, American Machine Tools Co., 2020
- Occupational Safety and Health Administration (OSHA) Guidelines for Power Tool Operation, U.S. Department of Labor, 2022
- Metal Fabrication Technology: A Practical Guide, McGraw-Hill Education, 2019
Shandong TaoFong CNC Machine Tool Co., Ltd.
Shandong TaoFong CNC Machine Tool Co., Ltd. is one of the most professional radial drilling machine manufacturers and suppliers in China, featured by quality products and good price. Please rest assured to buy durable radial drilling machine for sale here from our factory. Customized orders are welcome.
Address: No.3189, East of Longquan Road and North of Kangzhuang Road, South sha he, Tengzhou City, Zaozhuang City, Shandong Province
E-mail: tony@tafocnc.com
WebSite: https://www.tafocnc.com/
